Give Bakery Because. It’s Gifting Made Delicious
I have teamed up with Give Bakery Because to encourage people to visit the bakery department of their local grocery store to find easy and delicious treats that you can personalize and give as gifts “just because” or on any gifting occasion.
This is the first year I’ve had two kids enrolled in school full time. So I’ve gotten really involved with the PTO, and I volunteer twice a week in my daughter’s kindergarten class. I arrive early in the morning and help the kids learn their sight words for the week.
The bakery section of your local grocery store is the perfect place for unique gifting options. With simple creative packaging, a baked good can become a personalized (and delicious!) gift that will make someone’s day a little brighter. It’s simple, easy and affordable—no baking required! 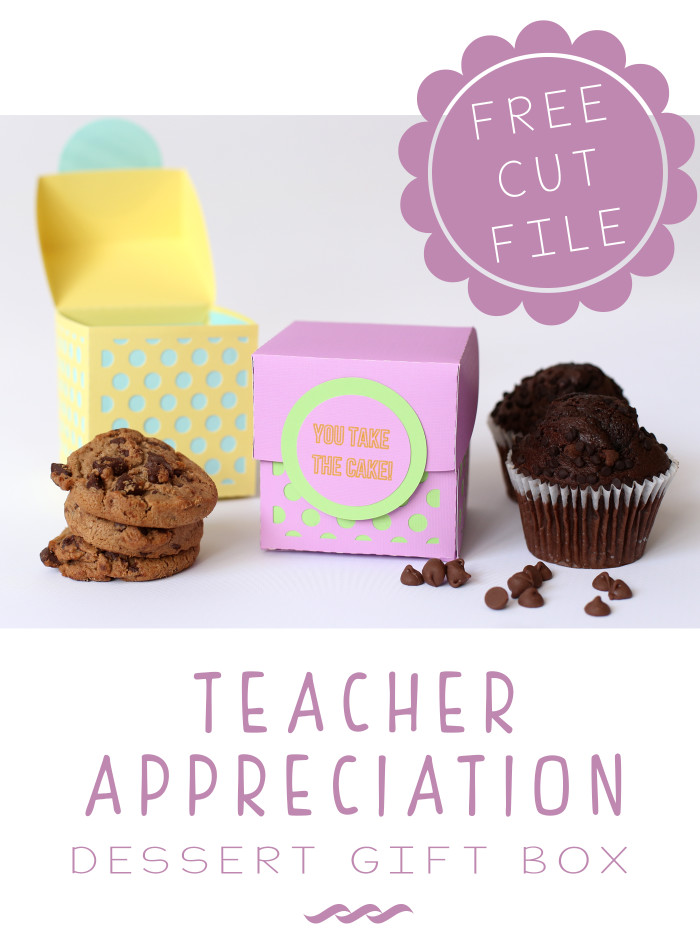
I decided to make a teacher appreciation gift for both of the teachers. They work their tails off and don’t always have time for breakfast, so these treats are the perfect snack.
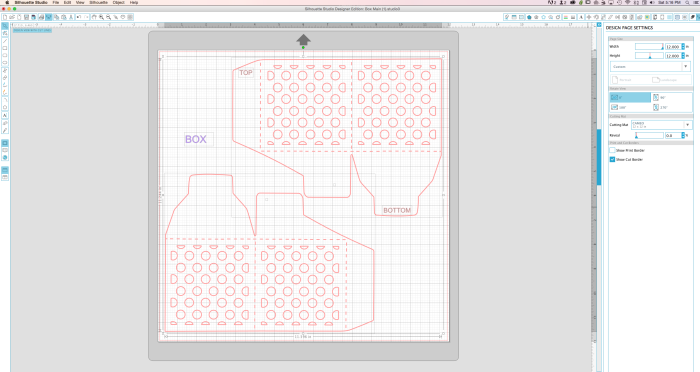
I created the gift box with my Silhouette CAMEO. It’s large enough to fit any bakery item, but you could also resize the template for smaller bite-sized treats.
These chocolate chip muffins from the bakery at my local grocery store are my absolute favorite! They are like chocolate chip cupcakes topped with mini chocolate chips.
Supplies:
Bakery Treats from your local grocery store
12 x 12 Cardstock (3 sheets per gift box)
Hot Glue or Glue Runner
Silhouette CAMEO
Free Download:
>>> CLICK HERE <<< to download the FREE Silhouette Cut Files.
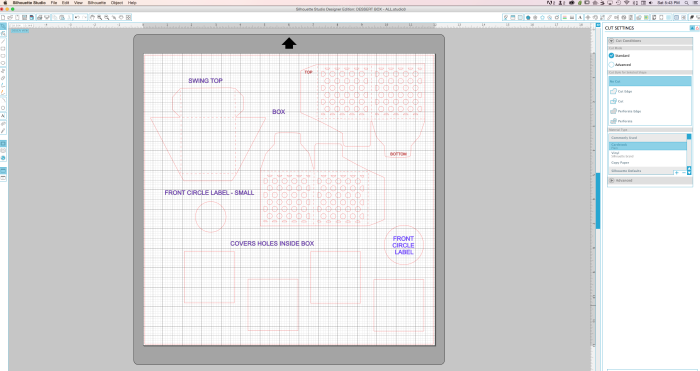
There are 4 total .studio3 files. One file called “DESSERT BOX – ALL” has the entire template on one page that can be resized to create any size box. The other three files (labeled 1, 2, 3) have been resized to create the gift box shown here, which is just under 4 inches by 4 inches.
This size gift box is perfect for cupcakes, muffins, and cookies.
You’ll need three sheets of card stock for this dessert box. Two sheets the same color for the box and swing top lid, and a different color to show through the holes.
STEP 1: Once you have everything cut out, the first thing you need to do is cover the holes with the 4 square sheets of paper and glue your two box pieces together.
I normally use a glue runner for cardstock projects, but you could also use a hot glue gun.
STEP 2: Once you have most of your box glued together, it’s time to add the lid. To assemble the lid, glue the small flaps to the inside edge.
STEP 3: You’ll want to glue the lid to the inside of the box before you glue the last edge of your box (shown in the third row of photos below). It doesn’t really matter which edge you glue it to, just as long as you glue it to the top straight edge of the box.
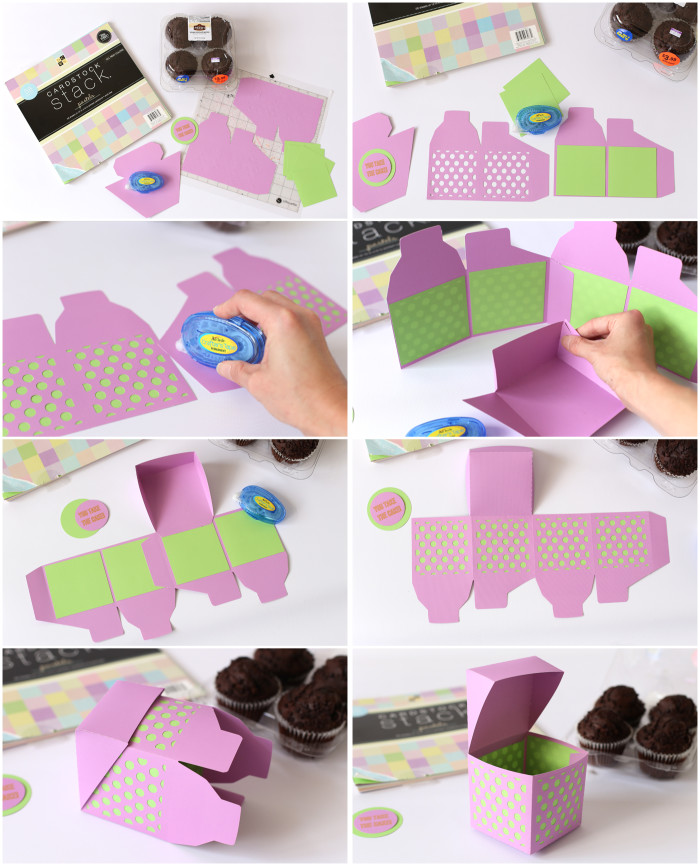
Now it should be beginning to look like a box. The only pieces to glue now are the bottom.
STEP 4: Place a small amount to glue on each of the flaps. Make sure you get a nice square fit. This is the bottom of your box so you want it to be secure.
STEP 5:Now the only two pieces you have left are your optional circle labels. You can use one circle label or layer the two circles together like I did. I used my Silhouette Sketch Pens to write “You Take The Cake” on the front of my box, but you could write or print anything on it.
For more quick and personalized gift ideas, check out the Bakery Because Pinterest page. If you make this marvelous box, please let me know by using the hashtag #givebakery.
Also check out my DIY Apple Treat Boxes for more gift ideas!
 I received compensation for my time to facilitate this post, but all opinions stated are my own.
Seriously, what teacher wouldn’t love that? It’s such a great way to show how much you appreciate them.
What a great and yummy way to show teachers that you appreciate them! This would be perfect for our end of year teacher appreciation luncheon!
That is the coolest! I need one of these machines to help me make some cool crafts, too – starting with something for my kids’ teachers.
That CAMEO looks like a fantastic machine for crafting. I must get one!
Those apple dessert boxes are absolutely precious! I have never seen anything quite like it.
That is such an awesome way to present a gift. I’m loving that cute design with those colors.
Those treat boxes are fantastic. I like giving baked goods.
This is such a cute idea. Good wrapping makes even the simplest gift seem more heartfelt.
Wow, a lot of work went into these adorable treat boxes! I love the color combo
Those boxes are so cute! I love to bring treats to my boys’ teachers.
What a super cute treat. I don’t know of any teacher who wouldn’t appreciate that.
What a darling box! I know my children’s teacher would love the gesture and acknowledgment for all of their hard work.
Just adorable! I would love to swap out the colors of cardstock each time and make a monthly treat tradition for my kids’ teachers.
This is great. My favorite part? That it’s wrapped in an apple!
This is such a cute idea! I too volunteered a lot in the classroom when my kids were in elementary school. There is so much for the teachers to do when the kids are young. I’m sure they really would appreciate a sweet gift like this too!
Oh my gosh! Those are so dang cute! Our kids’ teachers would love these!!!
Love the box, and have got it just about finished. Could you provide a picture of how the bottom of the box is to fit together?
These boxes are so cute, I like your creative work. thank you so much for sharing with us.