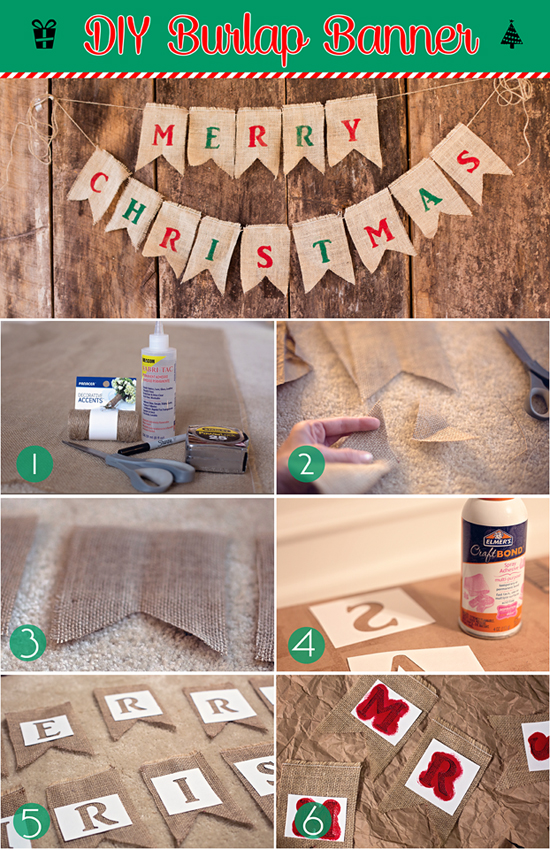
Supplies:
- Burlap
- Scissors
- Fabric Glue or Glue Gun
- Temporary Spray Glue
- Acrylic Paint
- No-Fray Spray
- Marker
- Measuring Tape
- Twine or Rope
- Stencils (make your own with the Silhouette Cameo)
First, before cutting, you want to spray your burlap with a no-fray spray. I used a gel which had to be applied to each flag once it was cut because I was out of spray. It was time-consuming and messy. Just stick with the spray, it’s worth it.
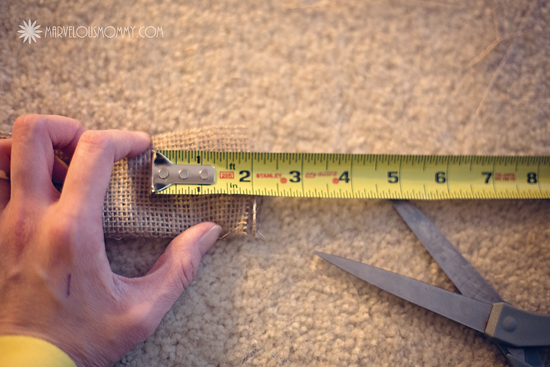
Next decide on the size of your banner. Each flag is 7 inches tall and 4.5 inches wide. And the triangle was cut about two inches deep. You could make them wider or shorter if you prefer.
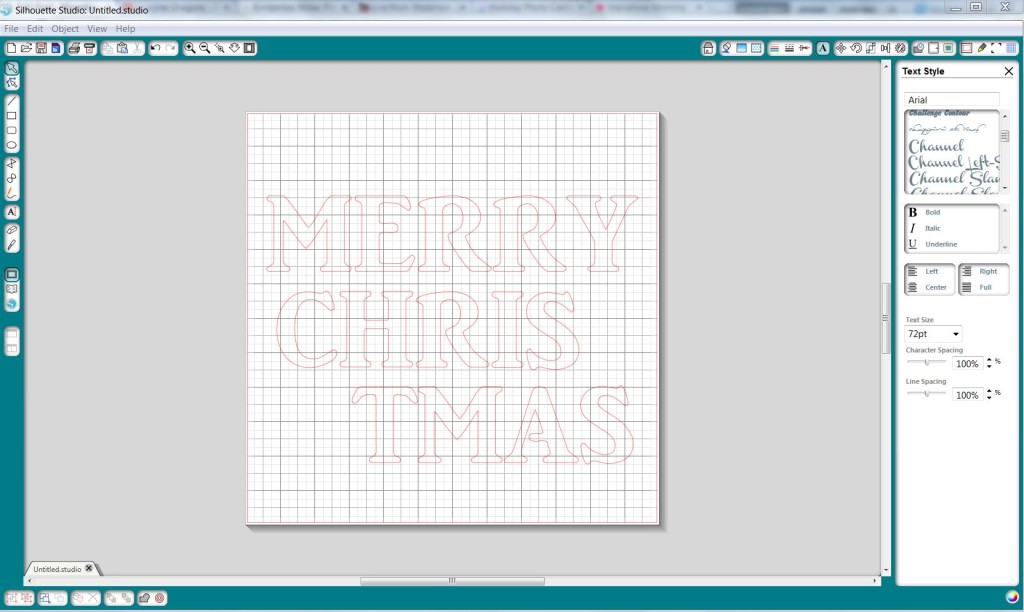
I designed the stencil in the Silhouette Studio very quickly. I used the font AR Julian and cut the letters on white card stock. Each letter is about 2.25 inches.
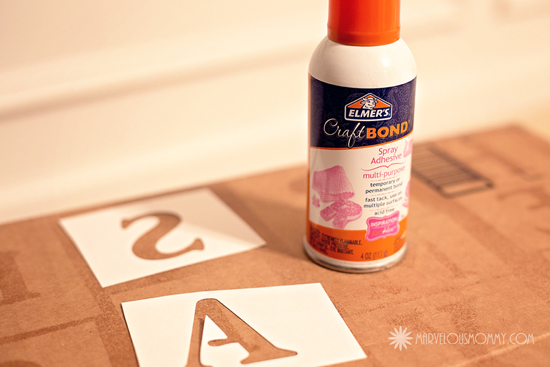
Use spray glue to keep the stencil from moving around. For a temporary hold, spray the back of your stencil and let it sit a minute before sticking it to the burlap.
I used red and green acrylic paint for my letters.
Once you’ve painted all the letters, remove your stencil immediately. You don’t want it to dry on the burlap. Just be careful not to smudge any paint.
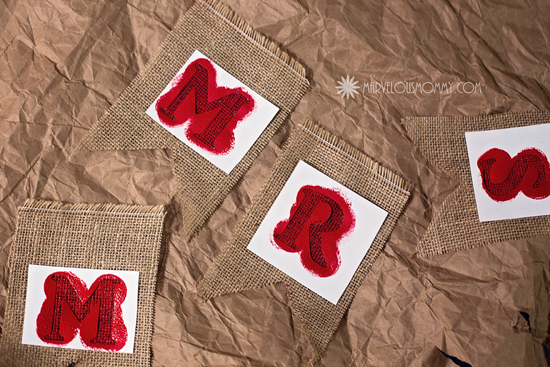
After the paint dried, I glued the burlap twine to the back of each flag.

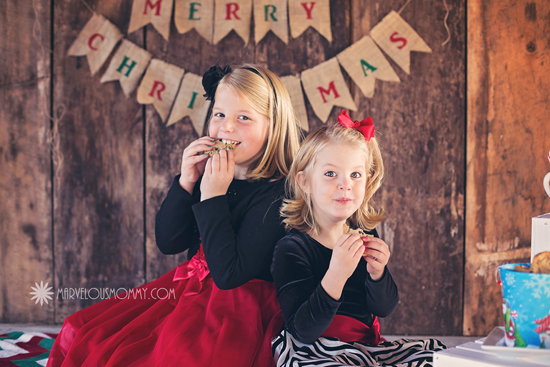
You could use this as a photography prop or as a Christmas decoration for your home!
If you enjoyed this post, please pin it and Follow Me on Pinterest for more DIY projects!
I love how this turned out. It looks really wonderful as a photo backdrop!
Thank you!
That looks cool! Where did you find the burlap?
The burlap came from Joann’s Fabric. I think it was about $4 a yard.
Ugh! So cute! These projects not not helping me Silhouette-wanting. Christmas is pretty wrapped up in the family, but maybe for a birthday?! The banner turned out perfectly.
I can’t believe how easy it was once you broke down the process. Good tip on using the spray, not the gel!
this.is.marvelous.
i love it. but then, i’m all about burlap these days!!
I love this! I’d love to do this for birthday parties! Oooo pink and glittery for a princess party! Great idea!
That’s really cute. It makes a great backdrop for your Christmas photo too!
This is a cute Christmas banner! I love easy crafts like this, and I could see it looking great hanging along a fireplace mantel.
What a super cute banner. Those Silhouette cutters sure seem to come in handy for all things crafty.
Oh my goodness, this is gorgeous! I want it hanging in my living room now! It looks like something I would buy. That last picture is precious.
This came out completely beautiful! I love it!
What an awesome banner! Your tutorial is so helpful, I think even I could make one 🙂 I LOVE how it looks in the background of your photo.
This Merry Christmas banner is so cute! And such an easy diy!