We are painting our entire house! The whole house, inside and out! We hired someone to paint the outside and we are painting the inside ourselves! The painters we hired finished the outside of the house in two days.
Meanwhile, we’ve only fully completed one room! Our living is almost there, too. We just have trim to paint and some touch-up on the fireplace.
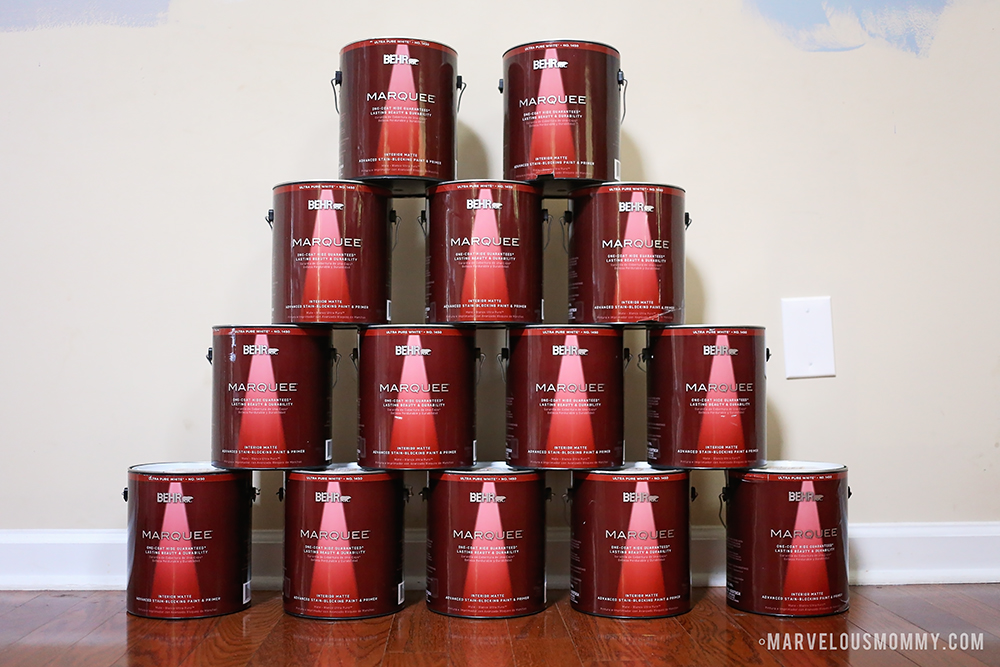
I absolutely love the colors we chose. All of them, in every room! We bought 21 color samples before we decided on any colors. And by we, I mean me. We have an open floor plan in our house so this wall color is going in every main room in the house. I had to be sure of the color before I committed.
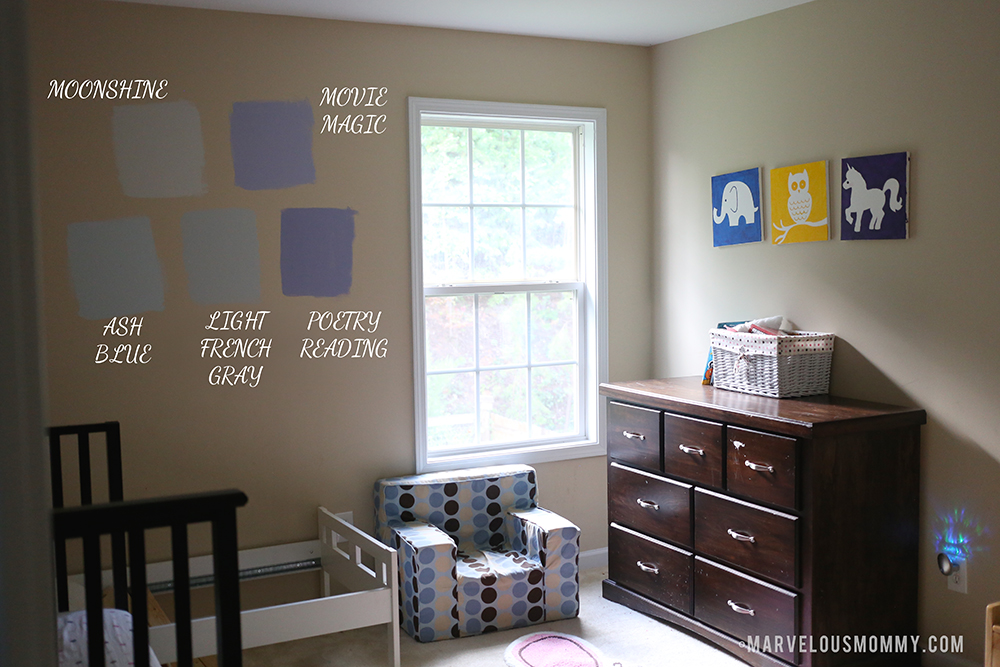
For Haley’s room, I selected 5 colors to choose from. I picked different shades of blue, but two were much more purple than I had expected. I wanted a soft grayish blue, so I decided to go with Ash Blue in Haley’s bedroom.
BEFORE

I was really impressed at how thick the paint was and how quickly it covered the walls. The entire room was done in one coat of paint. We used less than a gallon to paint the room, and we are using the remainder in the guest bathroom downstairs.
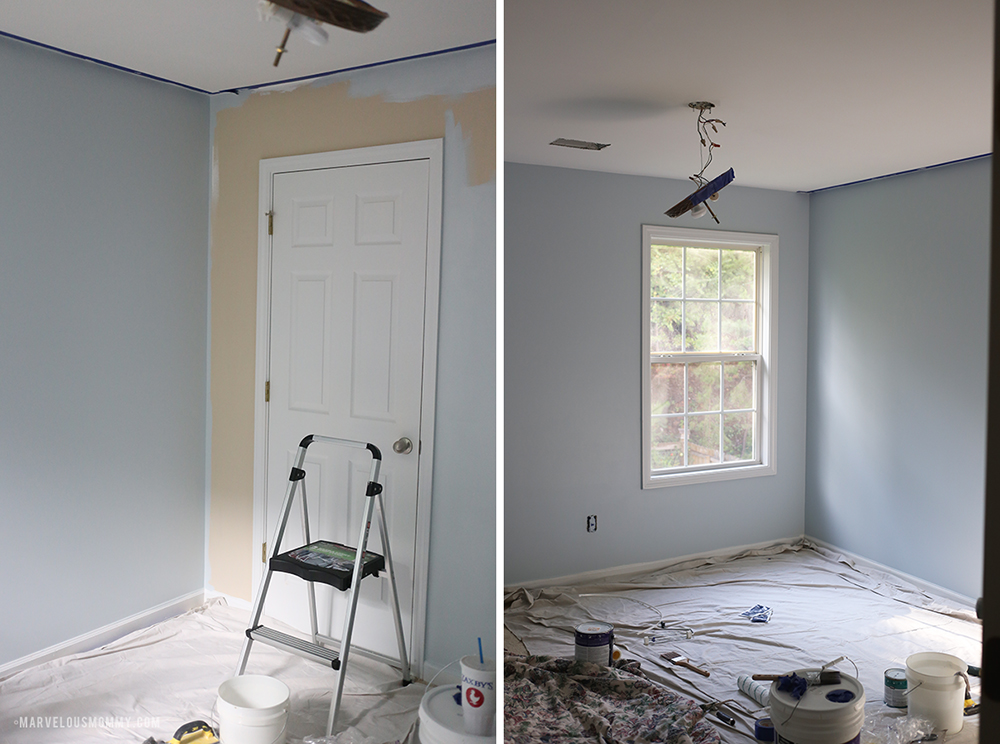
We painted her whole room. It really needed it! We started with the ceiling, did the walls, the trim, and we even painted the doors.
I also made a “sister” sign for her room using leftover paint can samples and old wood from a pallet. The sign actually didn’t cost me a dime!
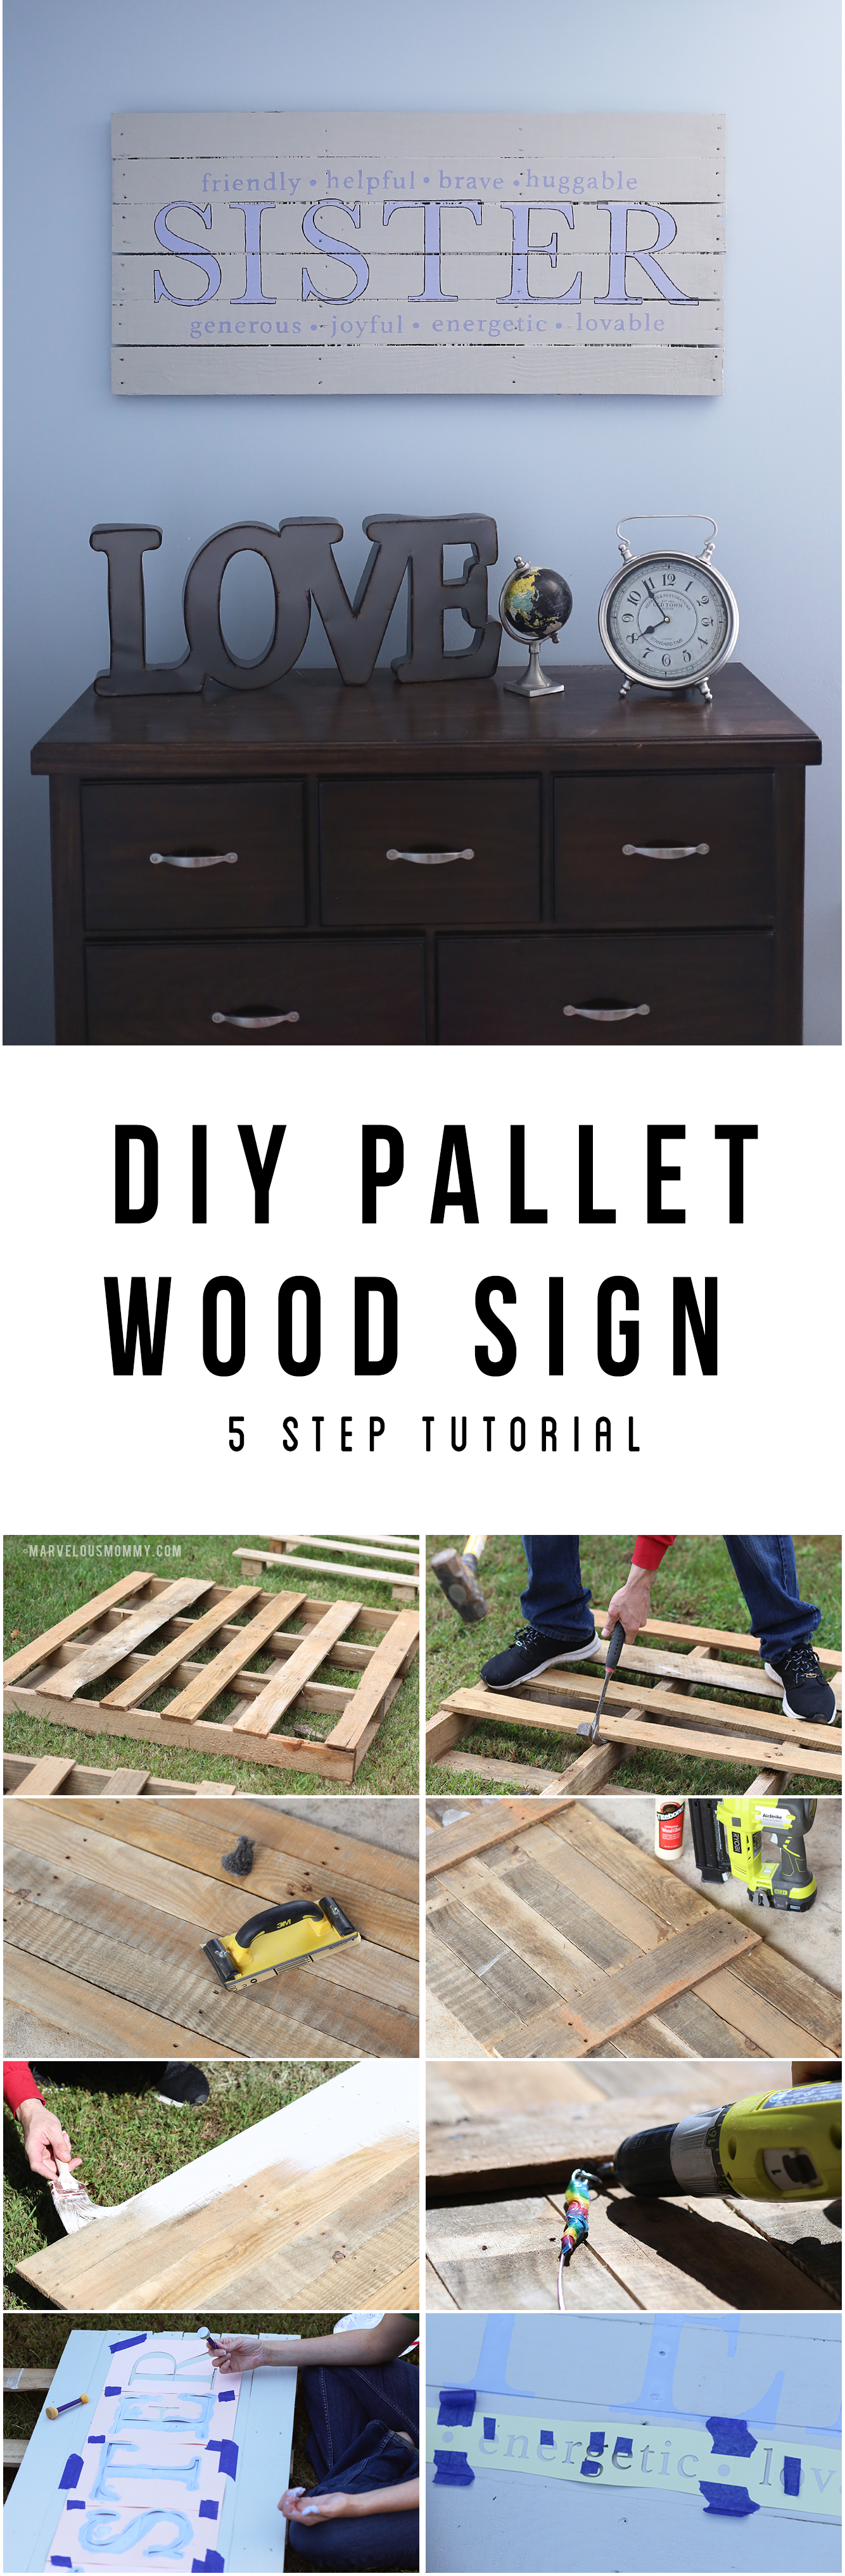
DIY Pallet Wood Sign
- Paint
- 7 (6 on front + 1 for the back) Pieces of Pallet Wood
- Vinyl Decal or Stencil
- Sponge Brush
- Steel Wool Pad
- Sandpaper
- Wood Glue
- Nail Gun or Screws
Dimensions: 2 feet tall x 4 feet long
Step 1:
Gather your pallets and begin removing the best looking pieces of wood. This can be tricky, but it actually went pretty quick with a sledge hammer and hammer claw.
Step 2:
Clean off all the dirt and mud with a steel wool pad. The dirt wipes off easier when the wood is dry so there’s no need to wash it with water.
Step 3:
Now that your wood is semi-clean, begin sanding down all sides so you have a smooth, even surface. This step will continue to clean up the wood and help remove any stubborn dirt.
Step 4:
Your wood is prepped, now we just need to connect the pieces. Using the 1 extra piece of pallet wood, cut it into two pieces long enough to reach across all 6 boards on the back side of your sign. We used wood glue and a nail gun to hold it and added a few extra screws to secure it.
Step 5:
You are ready for paint! I created a stencil with my Silhouette CAMEO, and I used a sponge brush to paint on the letters. I had so many paint samples leftover, I decided to use the purple-ish paint color, Movie Magic, for the letters on my sign.
You could also use vinyl letters instead of paint to achieve the same effect. Afterwards, I decided I wanted to make the “sister” stand out more so I used a black permanent marker to trace around the letters.
AFTER
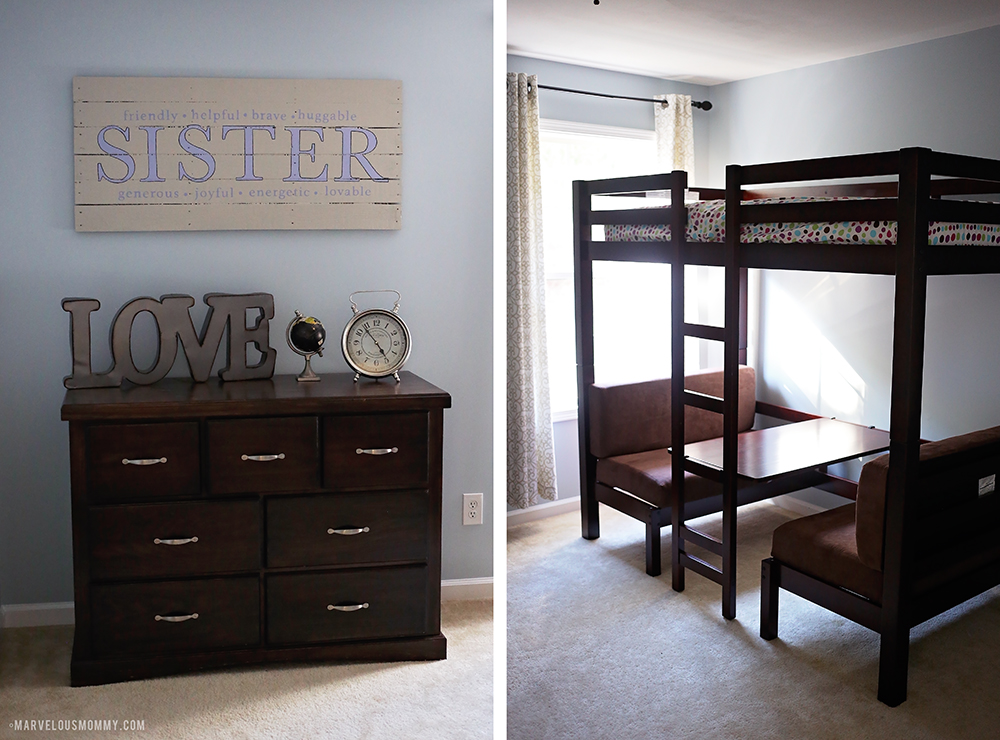
The curtains I picked up at Ross really complement the walls. They were exactly what I was looking for. (By the way, I hung that curtain rod up all by myself! My first one ever, haha!)
My husband and my dad built that custom dresser to my preferred “diaper changing height” when I was pregnant with Natalie in 2009. We replaced the changing pad on top with some new decor items that also came from Ross.
Haley’s new bed (Coaster Twin Size Convertible Loft Bed) is one my favorite things in the room! We looked at lots of twin beds but couldn’t find anything we really loved, and I was scared to purchase one online without seeing it in person. I had been watching the price on this bed jump up and down from $700 – $1200 on Amazon, so when when it dropped down low again I snatched it up!
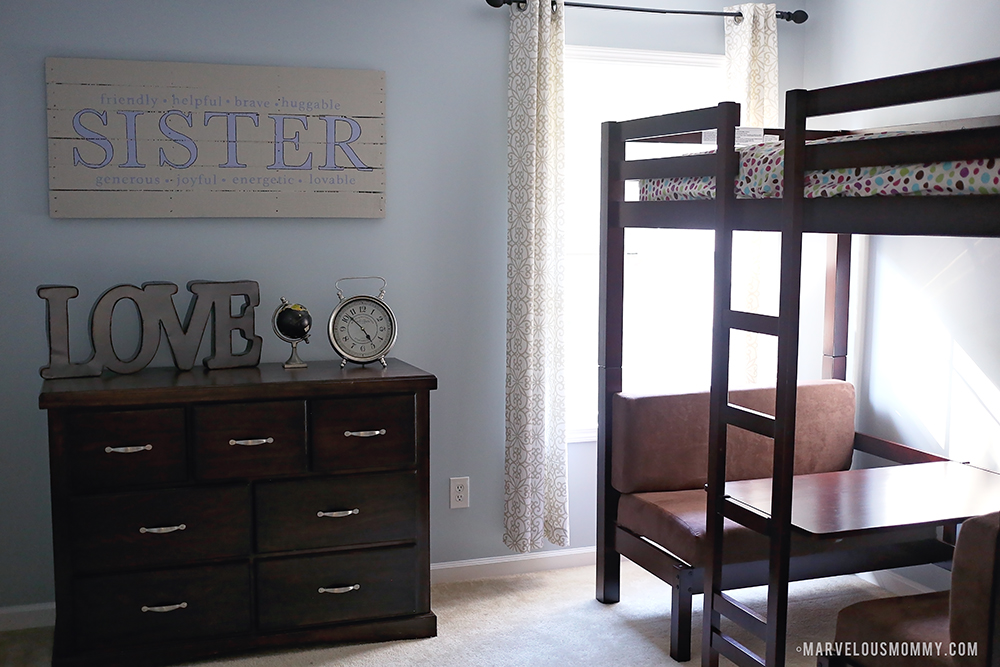
I couldn’t be happier with it! Both the girls love it, the bottom table converts into an extra twin bed, and it matches the dresser perfectly!
Very nice Amy, I love it! You did a great job!
I absolutely LOVE it. It came out awesome 🙂
Love it, love it, LOVE it! That rustic look is my favorite, and it seems fairly easy to do, as well.
I love the Ash Blue color, the other 2 had too much purple in them and the blue color is more versatile. That bed is amazing! My son has a loft bed from Ikea, and I need to go price the lower desk attachment for him.
That Ash Blue is such a pretty color and it’s fantastic that the room only needed one coat of paint. I love your pallet project, that came out really nice. Great job!
I love the room and the colors work really well together. That loft bed is just the coolest! Who wouldn’t love one of those?
The cutest project ever! Love the cost too LOL. I applaud your painting efforts. I think it’s very hard to settle on a color.
I love that room! You picked the right shade to make the wood pop and I love the pallet idea.
I love the room and color you decided on. The sign is so cute!
Every time I see a pallet sign I fall in love and this one is no exception. I would love to spend some girl time creating a sister sign for both of my daughters.
It’s just lovely! I love the blue you selected. We took a long time deciding our last paint color. I ended up painting swatches behind where we hang art, so that way I could put the art back up when we had company.
This room looks fantastic. I love the color you chose for the walls. Pallets can be made into such pretty things.
That is super cool! Love this great idea for an old pallet
First of all, I love the color you chose for the bedroom. It really makes the room. Secondly, I cannot believe how cute and easy the pallet sign was to make. Super cute!
The room and sign look great. I like that you used a blue color for a girls room.
What a beautiful DIY makeover! Love it!