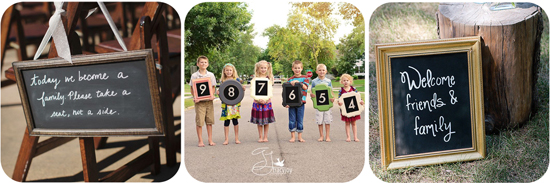
Chalkboard signs are great photography props. They work for any type of photo session and can be reused over and over again!
Supplies:
- Frame
- Plywood
- Measuring Tape
- Saw
- Spackling Paste
- Sandpaper
- Chalkboard Paint
How To:
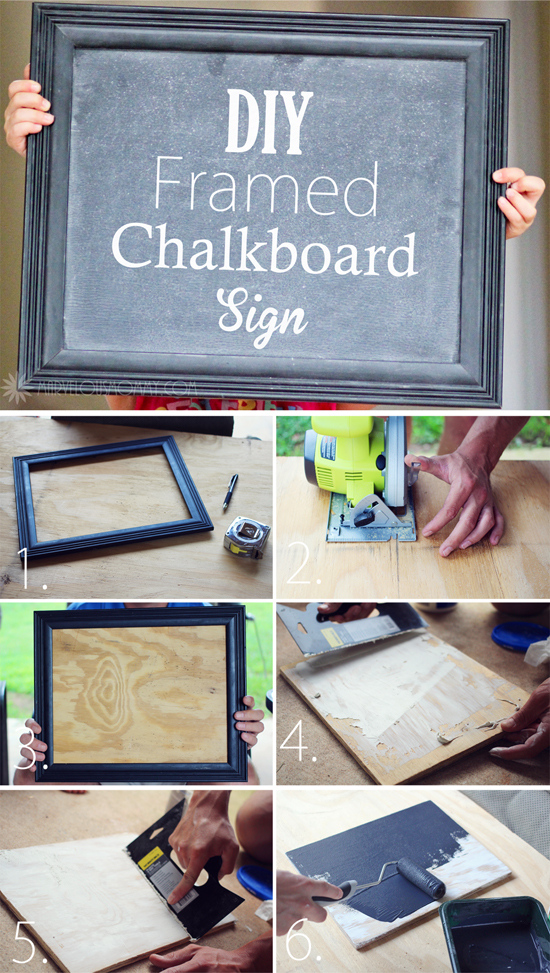
- Use any size frame. I used an old frame that I picked up at a yard sale. You could purchase a new frame or even reuse an old cabinet door.
- Cut the plywood to fit inside your frame.
- Sand the edges of your plywood. And make sure it fits in your frame.
- I used a beat up scrap piece of plywood. To smooth out the surface, I covered it with spackling paste.
- Once you have a thick layer of dry spackling, sand the surface with a fine grit sandpaper.
- Paint your plywood with chalkboard paint (or chalkboard spray paint), you’ll need a paint roller, not a brush. Once it has dried, attach your chalkboard to your frame with nails or glue.
If you’re doing a smaller chalkboard frame you may want to add a ribbon/rope to the top for hanging or attach a wooden stake for an outdoor sign. If you enjoyed this post, please follow me on Pinterest!
This post is brought to you by wholesaleposterframes.com, an online resource for inexpensive frames. However all views, opinions, and ideas are my own.
I am one of the least crafty people I know BUT I think I can tackle this one! Thanks so much for sharing. =)
I love this idea! I think this would be great for my childrens room! I didn’t know it was such a thing called chalk paint either!!
Your pictures and clear explanations make your tutorial great! Love all your projects 🙂
This is so cute and looks fun to make.
I love that it’s framed … I think it looks so much cleaner.
Thank you for linking to Raising Imperfection.
Please come back Friday to see if you were featured. 🙂
¤´¨)
¸.•*´
(¸¤ Lanaya | xoxo
Raising-Reagan.com
Thank you for linking to Raising Imperfection.
Please come back Friday to see if you were featured. 🙂
¤´¨)
¸.•*´
(¸¤ Lanaya | xoxo
Raising-Reagan.com
this is so pinterest worthy !:)
Hahaha thanks, I try 😉
What a cute idea to make your own. I’ve seen these that you can purchase to write on them 1st day of Kindergarten, etc. Homemade items can be customized which is nice.
Adorable!
Thank you for linking up to Raising Imperfection!
Make sure to check back on Friday to see if you were featured.
Leslie
http://www.violetimperfection.com
I absolutely love this. Thanks for the great tutorial. You make it look so simple.
I’m so thankful that I found your site ..
I’m getting married October 3, 2015
i’m wanting to have a couple of chalk boards in my wedding. I’ve been looking at other sites and couldn’t believe how expensive chalk boards were. I was thinking there has to be a way to make one myself. I’m so beyond beyond thankful I came upon your site. Now I can have a couple chalk boards in my wedding and save some more money..
thank you so much for sharing the info ..
Thank YOU for the sweet comment! Congrats on your engagement! Good luck with the wedding planning!