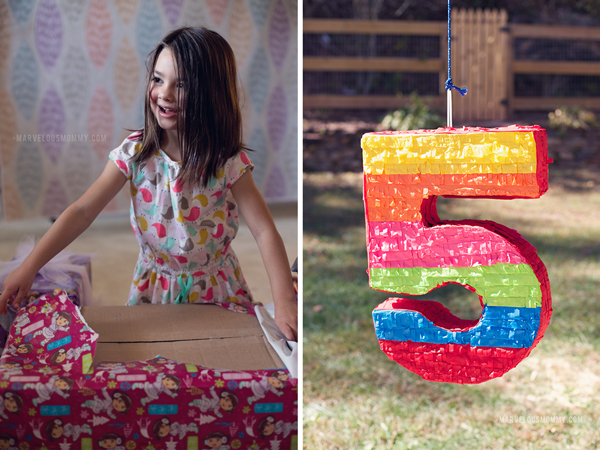
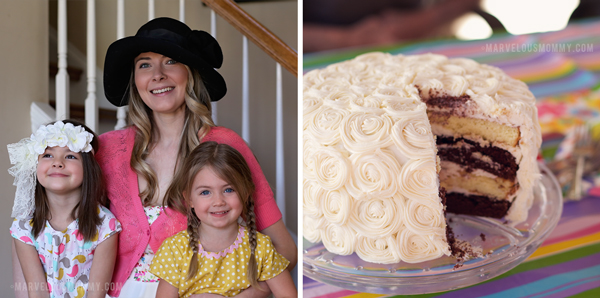
My little girl turned 5 years old last week. When she was born, it was hard to imagine this little tiny baby eventually growing into a walking, talking school aged kid.
And then I blinked… and she was grown! A perfect little mix of both me and her daddy with her own wild personality.
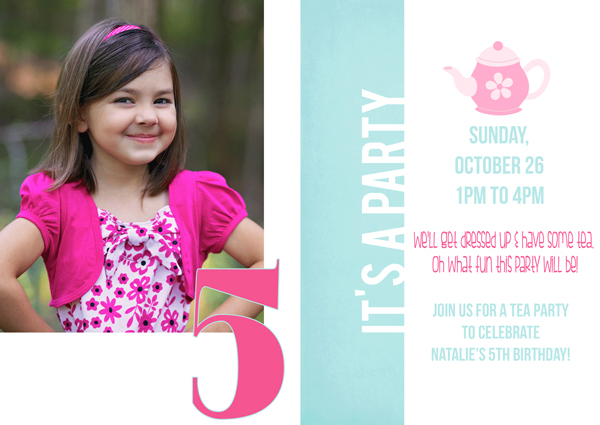
Each year I let my girls pick their birthday party theme. This year Natalie picked a tea party theme.
Her party invitation is a freebie from The Shoppe Designs – get it HERE. I altered it to fit the tea party theme.
I enjoy doing themed parties, creating the decorations, and baking special birthday cakes for my girls. I’ve built quite the collection of party decor, but I still like to make something unique for each party.
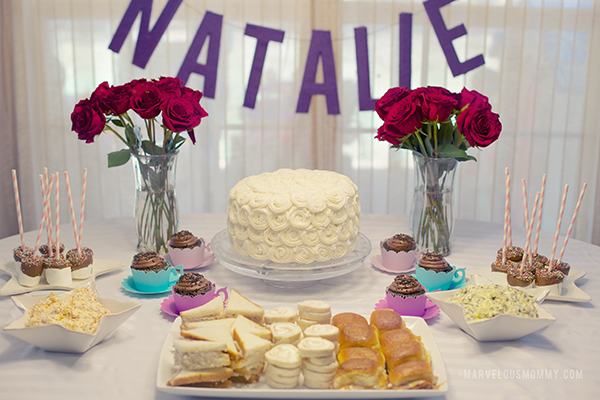
This year, I made a yarn wrapped letter banner and paper tea cup cupcake wrappers. The yarn banner cost me $5 – the price of the yarn. And the cupcake holders were made with cardstock I already had.
Yarn Wrapped Letters
I chose the “Bebas” font since it’s bold and completely straight. Then I cut the letters as large as I could on a sheet of red cardstock. I like to use double sided tape or glue to keep the red cardstock stuck to my cardboard while cutting. Cut your letters out of the cardboard with a utility knife for a clean cut.
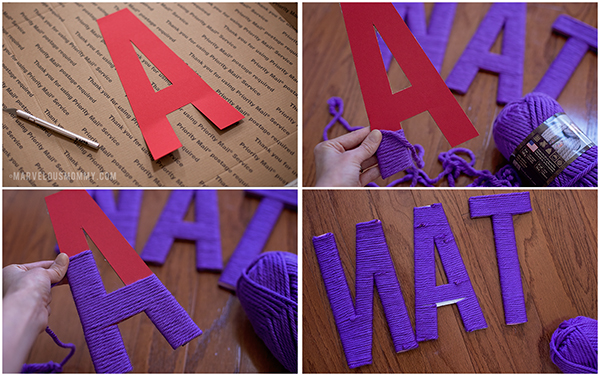
Start wrapping the cardboard letters with a thick yarn. Thin yarn will work too but it takes forever and I like the look of the thicker yarn better. You will need to stop and start in places so you can cover every section of the letters. Just make sure you start the new piece on the back of the letters.
Once you have finished all the letters, you could leave them as is and sit them on a shelf or table. OR you could hot glue the back of the letters to a piece of twine or rope for a banner, like I did.
Tea Cup – Cupcake Wrappers
The paper tea cups were made with textured pastel cardstock. I tested a few cupcake wrapper freebies I found before I created this template myself. I wanted my tea cups short so the icing on the cupcake would show.
Click to download the FREE Silhouette cut file – Tea Cup Cupcake Wrapper
UPDATED: Click here to download the free PDF file – Tea Cup Cupcake Wrapper PDF
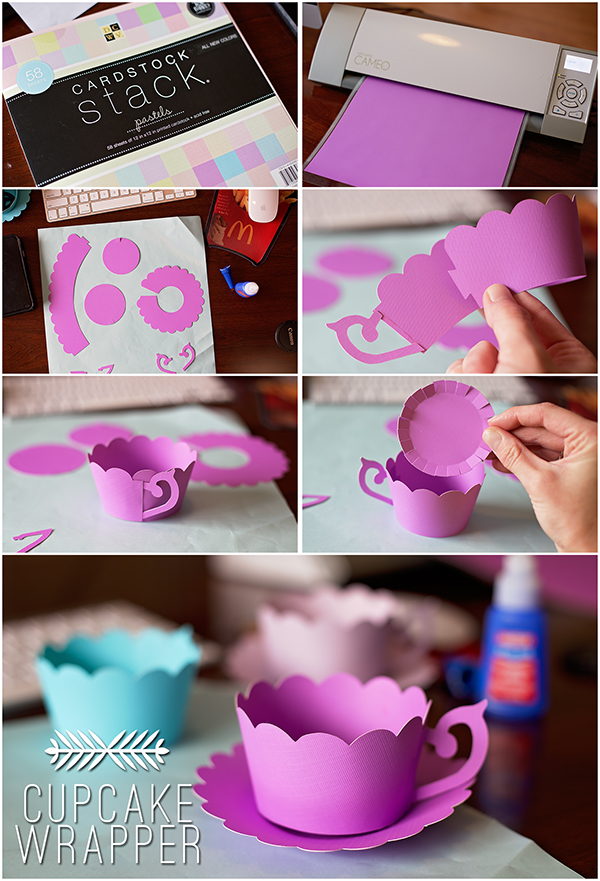
I cut my tea cups on a 12×12 sheet of cardstock. There are two different types of handles. Glue the two matching pieces together for a stronger handle.
Super glue the handle to the edge of the wrapper and let it dry before you bend out the handle. Next, add super glue to the inside of the lower part of the wrapper and attach the base of the cup (the larger of the two circles) by pushing it down from the top.
Then all you need to do is glue your plate for the cup to sit on. The cup and the plate should be two separate pieces.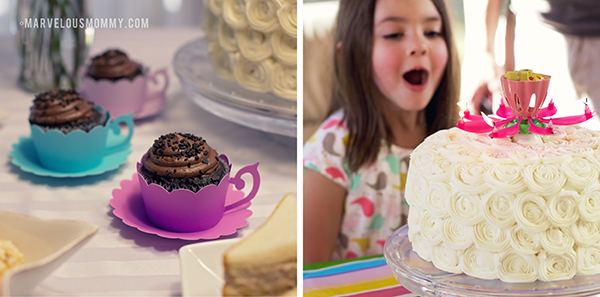
It sounds difficult but it’s actually quite easy. And you could always skip adding the handle and use them as plain scalloped cupcake wrappers.
Giveaway
Two (2) lucky winners will receive a Silhouette Portrait® electronic cutting machine. $179.99 value!
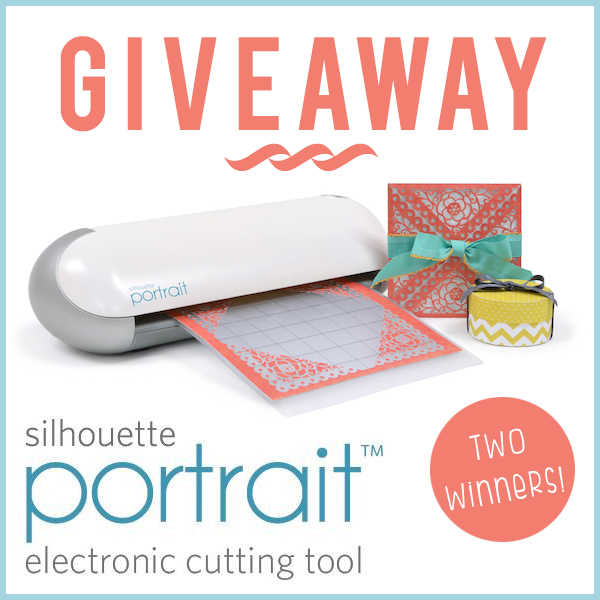
You’ll want the Silhouette Portrait® for its portability alone. At 16.25 inches and only 3.5 pounds, it can go anywhere with you. Like a home printer, it plugs into your PC or Mac with a simple USB cable. However, instead of printing, it uses a small blade to cut paper, cardstock, vinyl, fabric, and other material up to 8 inches wide and 10 feet long.
Enter below using the Rafflecopter form. Please note: Do not enter if you have won another Silhouette America giveaway in the past 90 days.
Disclosure: This post was written for Silhouette America and I make a little money if you use my discount code to purchase products. However, I really do freakin’ love my Silhouette machine and you will too! These views and opinions are my own and were not influenced by compensation.
I’d love to make some Christmas ornaments and an advent calendar!
I would like to make the home sweet home doormat and a tulip quilt.
I would love to make a stenciled door mat. There are so many amazing Sihlouette crafts!
I would like to make a heat transfer tshirt for my son to wear.
id like to create a boader for my sons room and some some names with it and ornaments
I would love to make etched glass candle holders!
I think I’d try to etch some plain glass vase I have.
I would love to learn to create dimensional backgrounds,for scrapbooking, and using it for decor items like the Fall Flowers they are just beautiful!
I’ve been wanting a Silhouette to create party tablescapes!
Those cupcake wrappers are absolutely amazing! I’m definitely pinning these!
I would love to make Tissue Boxes with Chipboard Accents
Those cupcake wrappers are too adorable! I think I would like to make some custom throw pillows with heat transfer if I won!
I’d like to do a baby shower for a friend.
I would like to etch glass (wine glasses) for my daughter for Christmas.
This would be awsome for myself, with my grand kids !
DIY RHINESTONE TEE.
I absolutely adore these cupcake wrappers! What a great idea to top off your tea party theme. I’m definitely going to make these for my daughter’s next birthday party! Thanks for the inspiration.
http://simplysophisticatedevents.blogspot.ca
If I win I would love to make the DIY Monogram Napkins as well as work on some scrap booking projects.
I would make Christmas shirts for my boys.
I’d love to make the Autumn Leaves Wreath.
I would love to create some field hockey embellishments for my daughter and her teammates — field hockey embellishments are quite difficult to locate!!!
I would love to make Thanksgiving Placecards
I would love to make cute newborn onesies
I’d like to make fun scrapbooks for holiday pictures.
If I had a Silhouette I would love to try making the desk organizer, this is just a start there were so many wonderful ideas on there to make it would be hard to just choose one.
This would be so much fun to win!